The purpose of estate planning is to consider what you want to have happen to your accounts and possessions after you pass away and to put plans in place to ensure your wishes are met. Nowadays, we have numerous digital accounts to look after as well.
In February 2015 , Facebook added the “Legacy Contact” feature that allows you to grant a Facebook Friend access to your Facebook page after you have passed away. Facebook currently has two options for what can happen to your account: it can be memorialized or it can be permanently deleted. Designating a Legacy Contact allows your friend to choose between these two options.
Facebook explains a Memorialized Account this way:
Memorialized accounts are a place for friends and family to gather and share memories after a person has passed away. Memorialized accounts have the following key features:
The word Remembering will be shown next to the person’s name on their profile Depending on the privacy settings of the account, friends can share memories on the memorialized Timeline Content the person shared (ex: photos, posts) stays on Facebook and is visible to the audience it was shared with Memorialized profiles don’t appear in public spaces such as in suggestions for People You May Know, ads or birthday reminders No one can log into a memorialized account Memorialized accounts that don’t have a legacy contact can’t be changed Pages with a sole admin whose account was memorialized will be removed from Facebook if we receive a valid request
Legacy contacts can make limited changes to a Memorialized page.
Facebook posted screenshots of the Mobile Phone process to add a Legacy Contact . If you are using your desktop computer, here is the process. If you know that you want your account to be permanently deleted and don’t need to designate a Legacy Contact, you still follow these steps to declare that intention to Facebook:
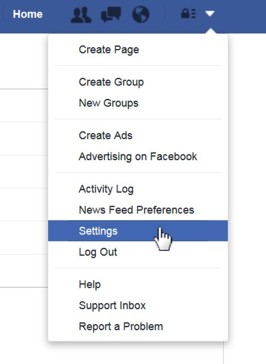
Step One: Navigate to SettingsLogin to Facebook and then, in the upper right corner, click on the down arrow to reveal your options drop-down menu. Then, click on “Settings” to open your Facebook settings. |
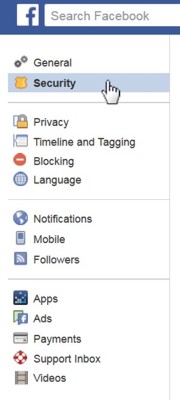
Step Two: Navigate to SecurityOnce your Settings menu is open, click on the “Security” tab on the left side to open your Security settings. |
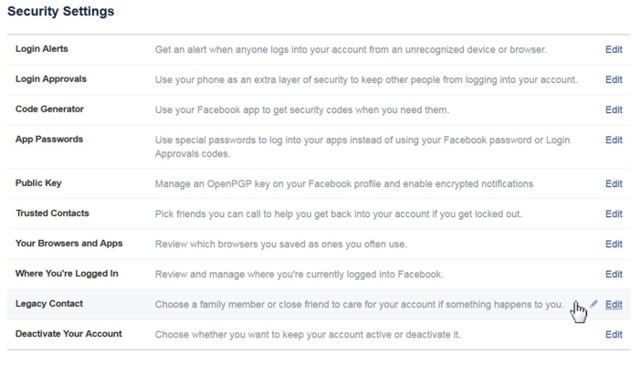
Step Three: Click to Edit “Legacy Contact”Once your Security settings are open, you will see a list of settings that you can edit. Near the bottom is “Legacy Contact,” which you can click on to edit. |
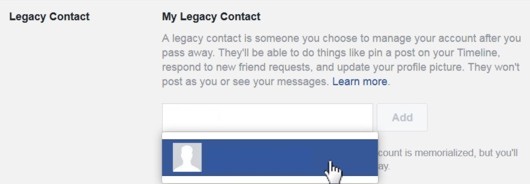
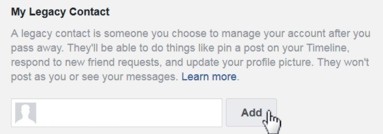
Step Four: Search For Your Chosen ContactIn the search box that appears, type the name of the friend you chose to be your legacy contact. Friends who match your search terms will appear as you type. When you see the friend you would like to designate as your legacy contact, click on them. This will put their information in the input box. |
Step Five: Click “Add”With your selected legacy contact in the input box, click the “Add” button next to their name. |
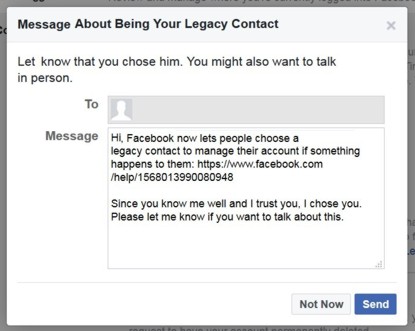
Step Six: Decide if you want to send them a message.After clicking “Add”, a window will pop up asking you if you want to send a message to your chosen legacy contact. The box will pre-fill with a message, which you can edit if you would like. If you want to send a message, review the pre-filled message, make your edits, and then click on “Send.” If you do not want to send a message, you can click “Not Now” instead to close the pop-up window. |
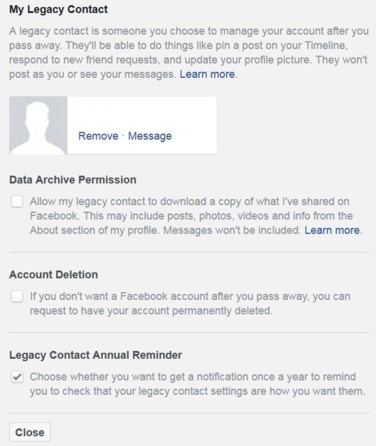
Step Seven: Review other settings.You have now set your legacy contact! You can take this time to review the other settings available. This includes:
After you have finished selecting these options, you can simply navigate away from this page. Your settings are saved as you have selected them. |